This is the final part of the 3D packaging presentation tutorial. where you will see how the illustrator design and the blender packaging render is assembled in Photoshop.
I have split this part in to several sub-parts like
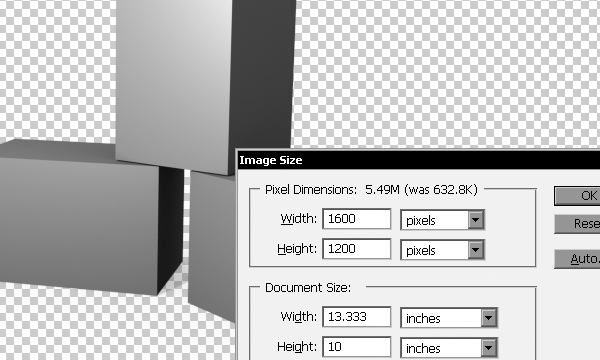
Open the png you have saved from the blender render at the end of the previous part. We have rendered it in 1600px x 1200px – right? Goto image > image size and you will see that it is in 72 dpi. Make the following changes to the png
Open the jpeg file that has been exported at the end of the first part of this tutorial.
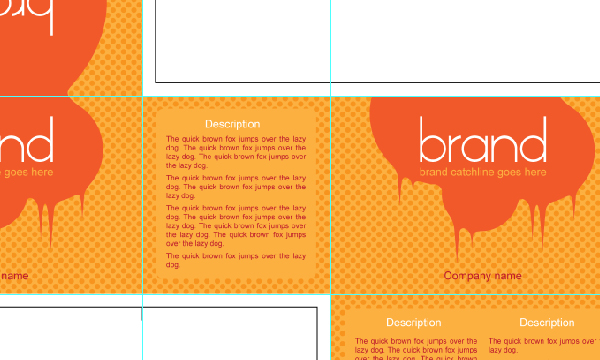
Our original illustrator template has crop marks and cutting marks on it – create guides through these marks so that we will know which part is for which panel of our dummy.
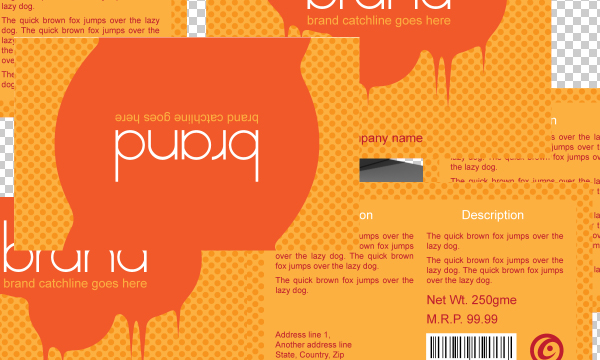
Now select the different parts of the jpeg along the guides and copy them to the previously saved psd – our main presentation template. Be sure to rename all the panels properly, otherwise later they will all jumble up. Don't afraid about placements or any other criteria – we will manage this later.
Now select each part individually, right click and select 'convert to smart objects'. No messing up please. At the end you will have six smart object layers for the six side of the box.
Open the image file of the wire-frame screenshot from our blender session and make a copy of it to the presentation psd. Bring it up to the top most layer in the layer stack. Change its opacity to 50% to make it see through.

scale the wire-frame to match it's dimension with the actual 3D render. You can't see behind the solids – this layer will act as a reference frame for placing the panels.
Select 'top' panels in layer stack and press ctrl+t to free transform this object. Distort this layer to make it look like, it is placed on the top portion of the box. You will need to rotate this 180 degrees too as the original top panel in our illustrator design is rotated in 180 degrees too.

Make a copy of the top 'smart object' and transform it again to fit it on top of the other box on the left. Your new layer is named as 'top Copy' – rename it to delete the 'copy' part from it.

Similarly copy – distort the other panels with reference to the wire-frame to create 'boxes'

Now bring the original png layer of the 3d render to the top of the layer stack and set its name as illumination. Set the layer blending mode of this layer to 'overlay' so that the lighter part of the layer will 'highlight' and darker parts cast 'shadow' on the underlying layers. You may adjust this layers brightness / contrast to match the proper light and shadow.
Now you can see some panels are not placed properly – it is time to fix these misplacements. Zoom very closer and distort them again to match the edges and corners with respect to the 3D render.
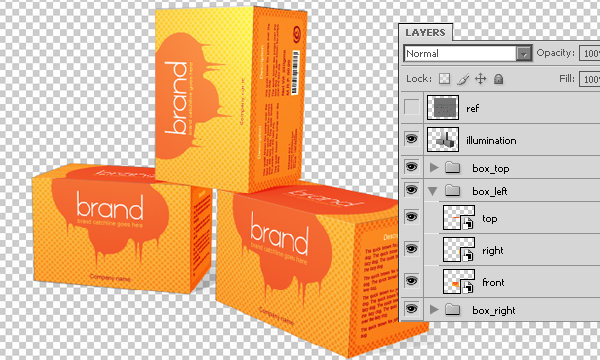
Select the move tool from the tools panel and ctrl select the corresponding layers for each box separately and press ctrl+g to group them to arrange the different smart objects into separate layer groups. Rename these groups as I have done for my presentation.
Lastly arrange these layer groups according to their order – here the disordered layers will be arranged automatically.
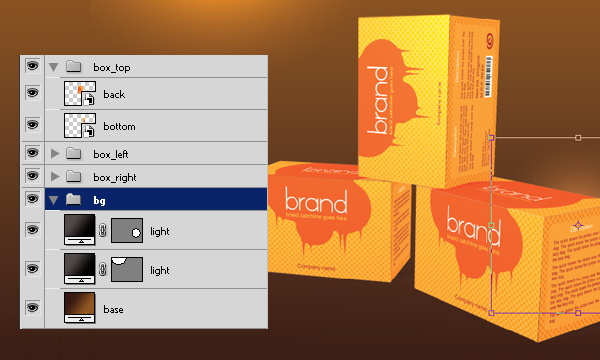
As the boxes are 'folded' now, we need to place them on some background. Just add three gradient layers below the bottom most 'box-right' layer group. The specification of these layers are as follows :
Check out the placements of the light layers in the thumbnail. Group these three layers under 'bg' layer group.

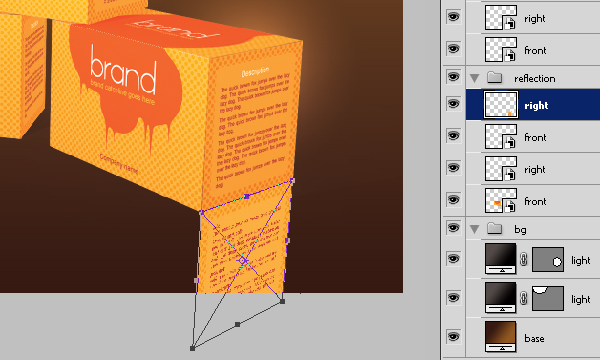
To make the presentation look more realistic we will now add simple reflection of the boxes on the ground.
Select the layers which are adjacent to the ground – you can see here in the screen shot – they are right and front panels of the bottom-most boxes. Now right click on any of the selected layers and click on the 'Duplicate Layers…'. In the 'Duplicate layers…' dialog box select 'this document' to make a duplicate of the selected layers inside the presentation. You can see there are four newly created layer with 'copy' at the end of their names and all are selected together. Press ctrl+g to group them inside a layer group, after that rename each to get reed of the'…copy' part from their names. Rename the layer group as 'reflection' and bring it down below the 'box_right' layer group.
Select ‘right’ smart object from inside ‘reflection’ layer group and press ctrl+t, right click on the image and select ‘flip vertical’ from the context menu. Then adjust the placement and roughly distort it so as to make it a reflection of the right panel of the right box on the glass table top. Make sure that the adjacent edges touch each other.
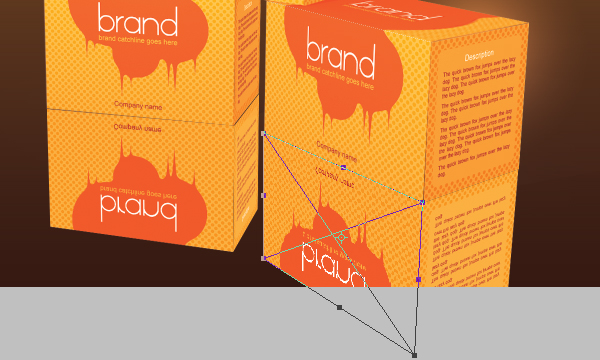
Flip other smart object layers inside the ‘reflection’ layer group and free transform each of them to make them look like that they are reflection of the corresponding panels.
Set opacity of the ‘right’ panels to 50% and that of the ‘front’ panels to 75% - as the source of light is on the top-left of our composition.
Now click on the reflection layer group and set it’s blend mode to overlay.
Also add a layer mask to it and draw gradient masks for area covered by each panels.
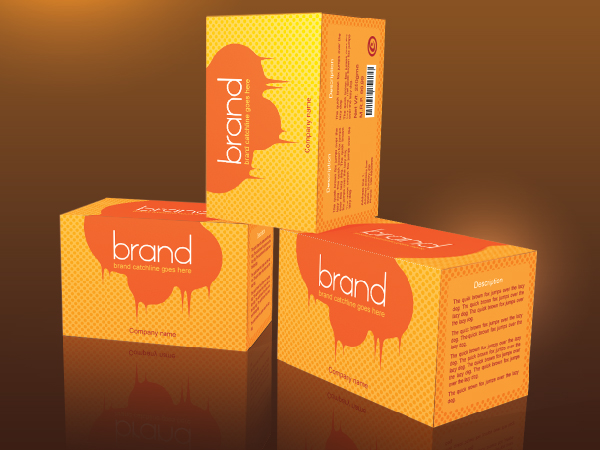
And this is the result!
Hope you will find this tutorial useful. Please be sure to comment on this tutorial – or if you have any suggestions – you are most welcome.
You may want to go to the introduction for revision.

I have split this part in to several sub-parts like
- Prepare workspace
- Creating panels
- Preparing references
- place in 3d
- adding background
- adding reflections
Prepare workspace

Open the png you have saved from the blender render at the end of the previous part. We have rendered it in 1600px x 1200px – right? Goto image > image size and you will see that it is in 72 dpi. Make the following changes to the png
- Set 120 for the resolution and reset image dimension to 1600px by 1200px inside image size dialog box. Select bi-cubic sharper as image interpolation method and hit ok.
- set image > mode > CMYK color.
Creating panels

Open the jpeg file that has been exported at the end of the first part of this tutorial.
Our original illustrator template has crop marks and cutting marks on it – create guides through these marks so that we will know which part is for which panel of our dummy.

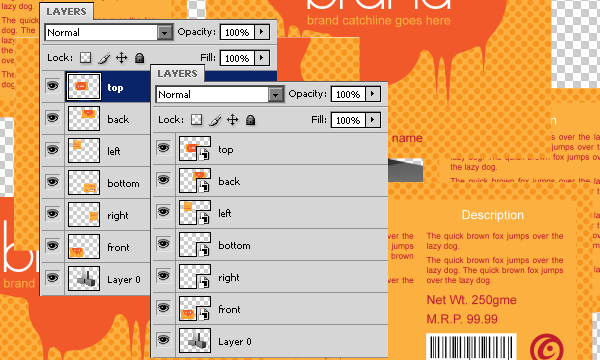
Now select the different parts of the jpeg along the guides and copy them to the previously saved psd – our main presentation template. Be sure to rename all the panels properly, otherwise later they will all jumble up. Don't afraid about placements or any other criteria – we will manage this later.

Now select each part individually, right click and select 'convert to smart objects'. No messing up please. At the end you will have six smart object layers for the six side of the box.
Prepare references

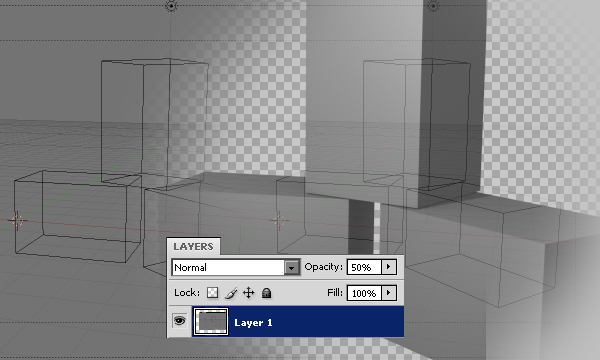
Open the image file of the wire-frame screenshot from our blender session and make a copy of it to the presentation psd. Bring it up to the top most layer in the layer stack. Change its opacity to 50% to make it see through.

scale the wire-frame to match it's dimension with the actual 3D render. You can't see behind the solids – this layer will act as a reference frame for placing the panels.
Place in 3D

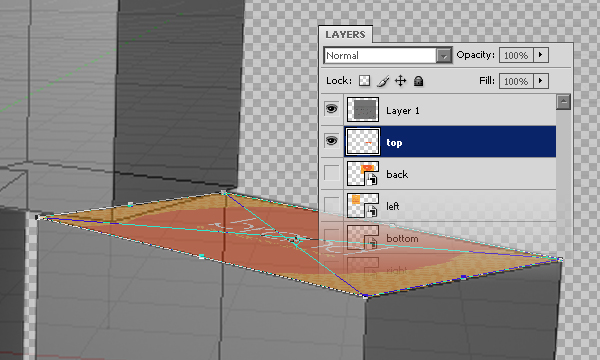
Select 'top' panels in layer stack and press ctrl+t to free transform this object. Distort this layer to make it look like, it is placed on the top portion of the box. You will need to rotate this 180 degrees too as the original top panel in our illustrator design is rotated in 180 degrees too.

Make a copy of the top 'smart object' and transform it again to fit it on top of the other box on the left. Your new layer is named as 'top Copy' – rename it to delete the 'copy' part from it.

Similarly copy – distort the other panels with reference to the wire-frame to create 'boxes'

Now bring the original png layer of the 3d render to the top of the layer stack and set its name as illumination. Set the layer blending mode of this layer to 'overlay' so that the lighter part of the layer will 'highlight' and darker parts cast 'shadow' on the underlying layers. You may adjust this layers brightness / contrast to match the proper light and shadow.

Now you can see some panels are not placed properly – it is time to fix these misplacements. Zoom very closer and distort them again to match the edges and corners with respect to the 3D render.

Select the move tool from the tools panel and ctrl select the corresponding layers for each box separately and press ctrl+g to group them to arrange the different smart objects into separate layer groups. Rename these groups as I have done for my presentation.
Lastly arrange these layer groups according to their order – here the disordered layers will be arranged automatically.
Add background

As the boxes are 'folded' now, we need to place them on some background. Just add three gradient layers below the bottom most 'box-right' layer group. The specification of these layers are as follows :
| Gradient type | Start color | End color | Layer blend mode | |
| Base | Linear - 90 degrees | C=50 m=75 y=75 k=75 | C=30 m=65 y=100 k=25 | Normal |
| Light (small) | Radial | All 50% | All 100% | Color dodge |
| Light (big) | Radial | All 50% | All 100% | Color dodge |
Add reflections

To make the presentation look more realistic we will now add simple reflection of the boxes on the ground.
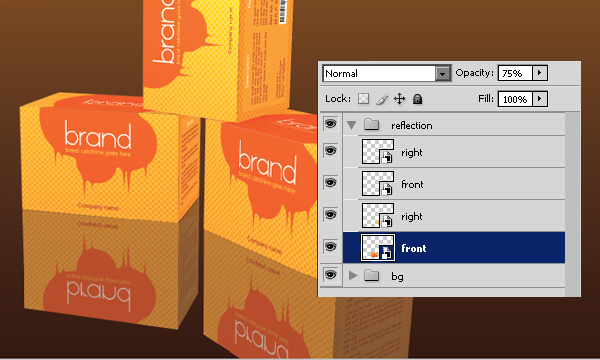
Select the layers which are adjacent to the ground – you can see here in the screen shot – they are right and front panels of the bottom-most boxes. Now right click on any of the selected layers and click on the 'Duplicate Layers…'. In the 'Duplicate layers…' dialog box select 'this document' to make a duplicate of the selected layers inside the presentation. You can see there are four newly created layer with 'copy' at the end of their names and all are selected together. Press ctrl+g to group them inside a layer group, after that rename each to get reed of the'…copy' part from their names. Rename the layer group as 'reflection' and bring it down below the 'box_right' layer group.

Select ‘right’ smart object from inside ‘reflection’ layer group and press ctrl+t, right click on the image and select ‘flip vertical’ from the context menu. Then adjust the placement and roughly distort it so as to make it a reflection of the right panel of the right box on the glass table top. Make sure that the adjacent edges touch each other.

Flip other smart object layers inside the ‘reflection’ layer group and free transform each of them to make them look like that they are reflection of the corresponding panels.

Set opacity of the ‘right’ panels to 50% and that of the ‘front’ panels to 75% - as the source of light is on the top-left of our composition.

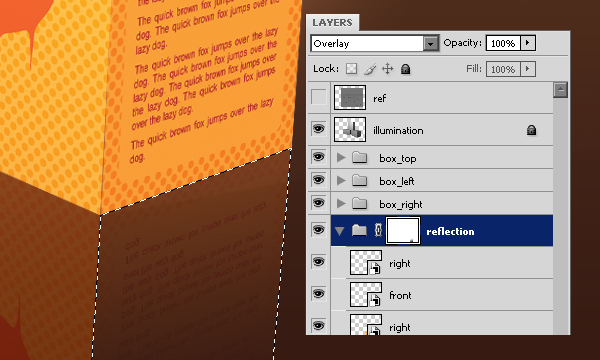
Now click on the reflection layer group and set it’s blend mode to overlay.
Also add a layer mask to it and draw gradient masks for area covered by each panels.
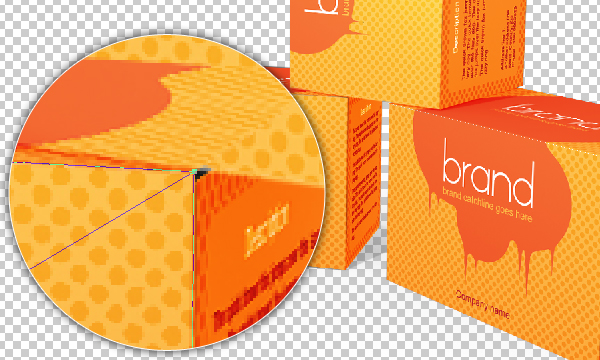
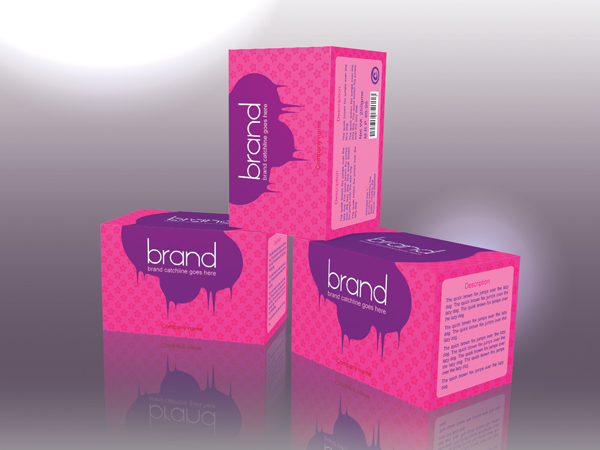
And this is the result!
Conclusion
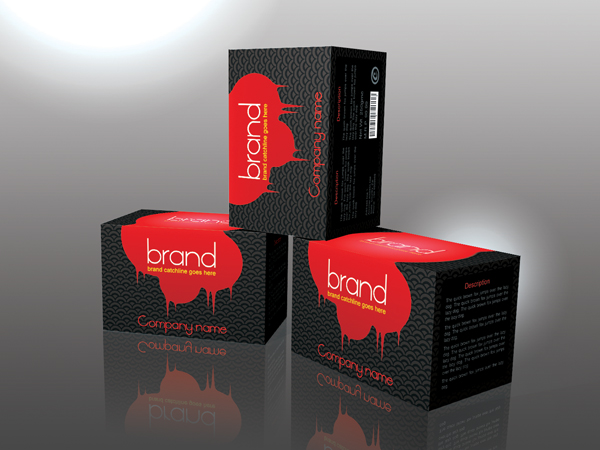
As I have told at the beginning of this tutorial – here is the most interesting part.Instant variations
You have the illustrator file for the packaging design and the psd for the 3D presentation. Now you can make a copy of the original illustrator file and alter the design may it be by varying the color scheme or by changing the element positions. When you are finished with it – export the result in jpg. Make a copy of the original 3D presentation and paste parts from the exported jpg inside the smart objects – your other product options are ready in a few seconds.

Hope you will find this tutorial useful. Please be sure to comment on this tutorial – or if you have any suggestions – you are most welcome.
You may want to go to the introduction for revision.
your a legend!!!!
ReplyDeletehey no!! i am still learning.
ReplyDeleteGreat! Just what I've been looking for.
ReplyDeleteThank you!
Thanks for sharing your wonderful article with us. We have a Clipping Path Services Company. Recently we have post an article about Pixelated Image in photoshop. Please check out. Thanks
ReplyDelete