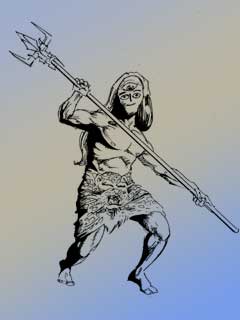
This is the second part of the Phostoshop vector coloring tutorial. In this part we are going to fill different parts of the main character with solid and gradient layers and add clipping paths to them.

Under Mahadev set I had added 5 gradient layers. For different parts of the body and the trident. To speed up the process actually I had added a single gradient layer first and then copied the layers hitting command+j or ctrl+j, and then adjusted the gradient values.
Here I did not take any additional set for the trident as it is not that complex one. Here are some samples of the gradient settings I used.
This is the gradient used for the third eye of Mahadev. Since the 'face' of Mahadev is painted so there will not be any color on the eyes or the smile
This one is the gradient setting for the trident. Note that it has an angle rather than 90 degree. The tint is slightly inclined to simulate the rhythm of the sunlight fallen on the metal.
And we have ended into a flat colored canvas. Since no gradient layer is clipped or cropped and since the trident layer is on the top of our visible layer stack, that's why is this result.
Again one thing has to kept in mind that every layer is placed properly inside the layer stack according to their 'z-depth', so that no overlapping or hiding happens while clipped.

I now added clipping paths using pen tool to the various layers.
After clipping, these layers look something like this

Finally we came up with an image like this.
Note that skin of Mahadev was roughly clipped on those areas where it overlapped with the tiger skin. I had cheated on those areas because it will be hidden under the tiger skin.
Read the previous part : Creating a workspace or continue reading to : Coloring accessories
Part 1 : Creating a workspace
Part 2: Coloring the character
Part 3 : Coloring accessories
Part 4 : Adding shadows and highlights
Part 5 : Painting the drappery
Part 6: Creating a background
Part 7 : Adding effects
Part 8 : Creating the blurb

Under Mahadev set I had added 5 gradient layers. For different parts of the body and the trident. To speed up the process actually I had added a single gradient layer first and then copied the layers hitting command+j or ctrl+j, and then adjusted the gradient values.
Here I did not take any additional set for the trident as it is not that complex one. Here are some samples of the gradient settings I used.

This is the gradient used for the third eye of Mahadev. Since the 'face' of Mahadev is painted so there will not be any color on the eyes or the smile

This one is the gradient setting for the trident. Note that it has an angle rather than 90 degree. The tint is slightly inclined to simulate the rhythm of the sunlight fallen on the metal.

And we have ended into a flat colored canvas. Since no gradient layer is clipped or cropped and since the trident layer is on the top of our visible layer stack, that's why is this result.
Again one thing has to kept in mind that every layer is placed properly inside the layer stack according to their 'z-depth', so that no overlapping or hiding happens while clipped.

I now added clipping paths using pen tool to the various layers.
After clipping, these layers look something like this
 |  |
| Trident | Skin |
 |  |
| Eye and eyeball together | Hair |

Finally we came up with an image like this.
Note that skin of Mahadev was roughly clipped on those areas where it overlapped with the tiger skin. I had cheated on those areas because it will be hidden under the tiger skin.
Read the previous part : Creating a workspace or continue reading to : Coloring accessories
Comments
Post a Comment